Recipe on How To Make Home-Made Cake Pops


There are different sizes, flavors, and colors of cake pops, which are produced from cake balls that have been designed to look like candy lollipops. You can make them from either cake mixes or shortening butter cakes.
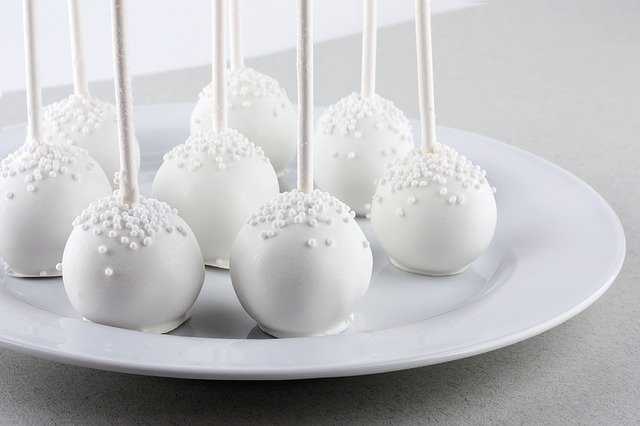
A lollipop stick is used to attach the formed cake ball, which is then dipped in candy melts to create a cake pop.

Top Ingredients for Making Cake Pops
You can simply make cake pops from the few ingredients below:
- Get an 18.25-ounce box cake mix.
- 9-by-13-in (23-by-33-cm) cake pan.
- Two baking sheets.
- Get a wax paper.
- Obtain a large mixing bowl.
- Get a 16-ounce container of ready-made frosting.
- Large metal spoon.
- Plastic wrap.
- 48-ounce candy coating.
- Add a deep, microwave-safe plastic bowl.
- Also, get 48 lollipop sticks.
- Get Styrofoam block.

How to Make 48 Cake Pops
It is recommended that you use a cake pan that is 9 by 13 inches (23 by 33 centimeters) to bake the cake. Allow cooling completely before using.
Take a deep breath and prepare yourself to crumble, roll, and dip 48 cake pops. Wax paper can be used to line the baking sheets before baking.
Using a large bowl, crumble the cake but make sure it is cooled. There shouldn't be any large bits of cake on your plate.
Add up to 34 of the frosting container to the bowl. (You won't need any of the frostings that are leftover. Keep it in the fridge for later use.)
It should be well mixed into the crumbled cake utilizing the back of a large metal spoon. The reason is that the cake balls will be too moist if you use the entire jar.
For best results, the mixture should be moist enough to roll into 1-inch (4-cm) rounds, but not so damp that they lose their round shape. After rolling the cake balls by hand and placing them on the baking pans, allow the cake to rest for about 20 minutes before chilling.
Plastic wrap the baking sheets and refrigerate or freeze them overnight. Ideally, the balls should be hard, but not completely frozen.
Melt the candy coating using the large microwave-safe bowl. You can easily coat the cake balls in confectionery coating while still holding on to the bowl without burning your fingertips.
Coatings should be around 3 inches (7.5 cm) thick to make dipping easier. About 16 ounces (455 grams) of coating at a time is what I use most often in my job.
As directed on the package, melt the candy coating according to the guidelines on the package. After each interval of 30 seconds, microwave on medium power for 30 seconds at a time, stirring in between.
As an alternative, a double boiler can be used. You should avoid overheating the coating.
You're now ready to dip. Frozen or refrigerated cake balls can be used as a starting point, but keep the rest frozen. As soon as they're solid enough, transfer them to a refrigerator if they've been in the freezer.
After you've coated the tip of the stick with the melted candy coating, push it straight into a cake ball, pressing it only halfway through. Submerge the cake ball completely in the melted candy coating while holding the lollipop stick with the cake ball attached.
Assemble the lollipop stick such that the coating joins at the base. So that the cake ball will stay on the stick when the coating hardens.
A cake ball must be entirely covered in icing and then removed without being dipped in the icing more than one time. Cake pops can get trapped in the candy coating if you re-submerge them.
The simpler it is to coat the cake pops, the thinner the coating must be. A few drops of vegetable oil or paramount crystals will help thin out an overly thick layer).
It is possible for a small amount of the candy coating to fall out of the cake pop's surface when you remove it from the candy coating.
Holding the cake pop in one hand, softly touch the first wrist with the other. Allow the extra coating to come off evenly by rotating the lollipop stick as needed.
You can tap and rotate the cake pop until it's totally submerged if you didn't. Until it reaches that point, it will slide down the cake ball's surface until it hits the lollipop stick.
If the bottom of the lollipop stick has too much coating, you can remove it with your finger. Your finger should be positioned under the cake ball and rotated to allow any excess coating to fall off and into the bowl.
Stick the cake pop into the Styrofoam block when the superfluous coating has been removed and it is no longer leaking. In a Styrofoam block, let the cake pops dry fully.
How to Store Cake Pops
Pops are best stored in the refrigerator in an airtight container. In order to prevent any condensation from forming on the unpackaged cake pops, it is vital to place paper towels between each layer.
Depending on if you used any fresh ingredients, such as cream, these sweets should last up to a week if stored carefully.
It's best to freeze the cake balls rather than a finished product because it's more likely to go bad when it's frozen. Defrost, then decorate as usual.
Author Bio
Contributor comprises full-time and freelance writers that form an integral part of the Editorial team of Hubslides working on different stages of content writing and publishing with overall goals of enriching the readers' knowledge through research and publishing of quality content.
Article Comments
No Comments!
At present there are zero comments on this article.
Why not be the first to make a comment?
Similar Articles
Sponsor
Search Articles

Experts Column
Latest Articles
Featured Articles


Most Popular Articles

